Showing posts with label ornaments. Show all posts

Saturday, September 7, 2013

A Fun Fall Fair

Well, I"ve been busy!
Next weekend (September 14-15)
 is the Campbell Valley Fair and I've been making things to sell in my booth.
Like what, you ask?
Well, there will be pumpkins.
Painted fabric pumpkins,
 pumpkins with faces, 
 little pumpkins with faces,
 burlap pumpkins,
 painted, flat pumpkins,
 wool pumpkins, 
 pumpkins on sticks,
and in garlands,
 scarecrow pumpkins,
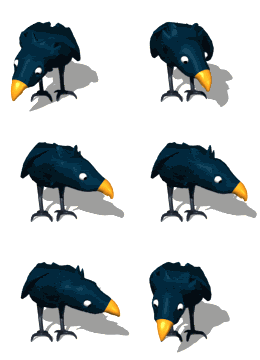
 pumpkins with crows,
 and crows on pumpkins.
Of course there'll be food...
 I can never grow these gourds with the long necks
so I decided to sew a few. 
 You can't have a fall fair without sunflowers,
 or a few cats,
and some crows,
 and a few more pumpkins.
Halloween's just around the corner
so we need a few scary things.
 How about a burlap owl or two? 
 Or a fat chenille spider and little spider-web coasters?
 This oh-so-creepy bat?
 Or some of these?
Did I say there'd be pumpkins?
And lots of other fun stuff!
Hope to see you there!

Wednesday, December 12, 2012

What Shall I Make Today? Little Light Ornies!

Wanting to make some last-minute decorations?
Here's a super quick and easy idea.
(I don't know if this is original or if I saw a version someplace--can't remember things like I used to!)
You'll need a battery-operated tea-light, an old jar lid, a rusty star, and some rusty wire.
Punch two holes in opposite sides of the lid.
I found the easiest way to do this was to tighten the lid in a vise and hammer a nail into it.
You'll also need to hammer a nail into the star to make a hole.
I found the white tea-lights at Michael's.
Since I prefer the grungy look, I painted the top and sides with black acrylic paint.
Before it dries, sprinkle with a mixture of ground instant coffee and cinnamon.
When dry, paint it with modge-podge (but not the bulb!)
Cut a length of rusty wire and insert one end into the hole in the lid.
Wrap the end around itself.
Thread the star onto the wire and bend the wire to hold it in place at the top.
Insert the other end of the wire into the other hole and wrap that end around itself.
Tear a little strip of homespun and tie it around the wire at the bottom.
Place the tea-light in the center of the lid.
Fill the area around it with bits of moss, berries, whatever you like.
That's it! 
Won't these look pretty nestled among my Santas on the mantle?
Or as little center-pieces on my Christmas table?
You could also give them away as party favours,
thread a tag with a guest's name on it onto the wire for a place setting,
or hang them on your tree.
Have fun!

Tuesday, November 6, 2012

It's Beginning to Look a Lot Like Christmas

I've been gearing up for next week's Vintage Market in nearby Maple Ridge, BC. I hope lots of you can make it out--it's going to be amazing!
In addition to lots of vintage items, I'm filling my booth with Christmas hand-mades.
Here's my Vintage Santa ornie.
For those of you who can't make it, I've downloaded a sampling of my handmade wares into my General Store.  If you click on the logo on the right, the link will take you to Christmas 2012.  And if you want to order anything, just let me know!