Showing posts with label free pattern. Show all posts

Friday, January 31, 2014

Free Quilt Pattern for Instant Download!

Hi dear friends,
With Valentine's Day approaching, I want to give back to all of you who have made my patterns over the years, enabling me to continue doing what I love--designing and making quilts.
So here's a scrappy little quilt for you to whip up.
You can see it's very simple--just two blocks--the Half-square triangle and the Nine-patch.  So if you're new to quilting, this will get you started.  And it's not overwhelming--just 21" square.  And if you've been quilting awhile, this pattern will help you use up some of the scraps in your stash.
It's so quick and easy to make, you can whip up a bunch to give to friends on Valentine's Day.
Best of all, it's FREE!!!
I call it "Opposites Attract" (to make it work with the Valentine's Day theme)
and you can download it on my Patternspot page.
While you're there, check out my other patterns that are available for instant download.
(From the response to my last post, it seems that a lot of you like the idea of instant downloading patterns so here I go!)
Hope you like the pattern and have fun!


Friday, November 23, 2012

What Shall I Make Today? A Burlap Wreath!

I love burlap wreaths but the patterns all seemed too complicated for me. So here's a simpler version. All you need is a prim star about 5" big, a roll of burlap (I got mine at Michael's) and a wire hoop (mine's an old garden one, minus the legs).
Start by opening the hoop and threading the center of the burlap onto one end of the hoop, from the back.
Leave a couple of inches and reinsert the hoop into the burlap.
Leave a couple of inches and push the hoop through to the top of the burlap.
Leave another couple of inches and reinsert the hoop into the burlap from the top.
You get the idea.
After you've woven the burlap roll onto the hoop, reclasp the ends with the star in between, to keep it in place.
Slip stitch the ends of the burlap together with some matching thread.
Tie a few bits of fabric or twine around the hoop every so often, to keep the burlap evenly distributed.
If you like, you can add a homespun bow at the top or just leave it as is.
And there you have it!
Enjoy!!

Thursday, October 25, 2012

What Shall I Make Today? Creepy Cobweb Coasters!

Here's a last-minute Halloween decorating idea for you!
Draw lines like this on a piece of graph paper.
My finished design will be 4 1/2" square so the cross-lines are at 2 1/4".
Make little marks at 3/4" down and across from each corner.
Draw an arc between the lines on the top half of the diagram, like this:
Fold the paper in half and cut out along the arcs.
Unfold the paper and pin to a double layer of muslin, with a piece of batting underneath.
Make sure to leave about 1/2" around the shape.
Sew around the shape, leaving one arc open.
Remove the piece from the machine and cut out 1/4" outside the stitching.
Cut straight across the points.

Turn the piece right side out through the opening.
Use a chopstick or other pointy thing to get into the points.
Hand-stitch the opening closed.
Place the piece between 2 single layers of cheesecloth.
Machine-stitch with contrasting thread across the shape from point to point,
making sure to intersect in the center.
After you've stitched the 4 lines across the piece,
move your needle about 1/2" toward the center.
Following the arcs, stitch around the shape.
When you get back to the beginning,
move your needle another 1/2" toward the center
and stitch again around the shape, following the arcs.
Repeat once more and remove from the machine.
Trim any long threads and the cheesecloth loosely around the shape.
If you like, you can brush some stiffener onto both sides of the shape and let dry.
Your creepy cobweb coasters are finished!
If you want, you can loop a length of thread through a point and hang them around your house.
Happy Halloween everyone!

Wednesday, September 26, 2012

What Shall I Make Today? Burlap Pumpkins!

Sometimes I want to take a break from quilting and just make stuff to decorate my home or sell at craft markets. Here's an idea I came up with for fall--burlap pumpkins!
First, find a plate or something with the diameter you want--mine was 8" across. 
Place it on a double layer of burlap and trace around it with a pencil.
Cut out the circles 1/4" outside of the traced line.

Sew all the way around the circle on the traced line.
Separate the two circles and cut a small "x" in the center of one of them.
Turn the circles right side out through the opening.
Stuff with polyfil.
Cut a length of twine, thread it through your largest needle, and knot the end.
Push it through the opening to the other side.
When it comes through the center of the other side, pull the twine around the circles and reinsert it into the opening.
Pull it around the opposite side.
Turn the circle one-quarter of the way around and pull the twine around and through the bottom center.
When you come to the end of the twine, knot it off and bring the end into the center of the pumpkin.

Keep going until you've divided the circles into 8 sections.
This is what it should look like when you're done this part.
Find a stick about 1" in diameter and cut off a 2" long piece.
Put a bit of hot glue on one end.
Press the glued end of the stick down into the opening of the pumpkin.
Squirt some more hot glue around the stick onto the pumpkin opening.
Press some Spanish moss onto the glue to cover the opening.
Enjoy your burlap pumpkins!


Happy fall, y'all!

Wednesday, April 18, 2012

Free Pattern--Little Lambs Garland

Here's a sweet little wooly lamb garland to welcome spring into your home.
And it's easy and fun to make!
First, take a lid about 3" wide and trace around it onto a double layer of muslin.  
Make 3 circles at least 1/2" apart.
Pin the circles together and stitch around them on the traced lines, leaving about 1 1/2" open.
Cut out 1/4" beyond the traced line.
Turn the circles right side out.
Draw an oval about 3/4" wide and 1" long onto a piece of freezer paper.
Center the oval above the circle opening and about 1/2" from the edge.
Iron the freezer paper onto the circle.
Trace around each oval and remove the freezer paper.
Stuff with polyfil.
Thread a long needle and knot one end.
Bring the needle up through the opening and through the inside, coming out at the top of the oval.
Take a little stitch to the right and bring the needle inside through the polyfil close to the start of the first stitch.
Take a second small stitch down the left side of the oval and come up at the bottom of the stitch on the right side.  (If you've ever made sculpted noses on dolls, this is the same thing.)
Pull the stitches together a little bit, just to make the face 3 dimensional.
Repeat all the way to the bottom of the oval and knot off your thread inside the circle.
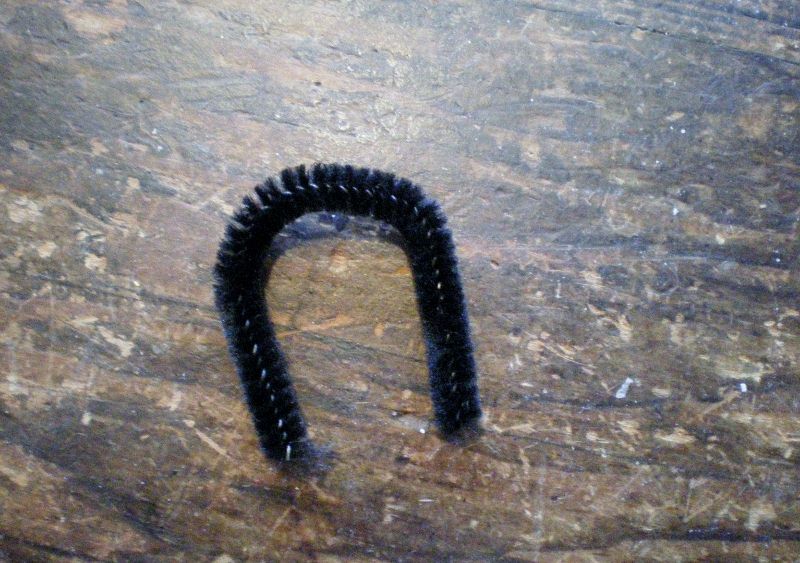
Cut a 3" long piece of black chenille stem and form into an upside-down "U".
Insert the rounded part of the stem into the opening on the circle.
Hand-stitch the opening closed.
Paint the inside of the oval black and let dry.
Sand the oval a little bit with fine sandpaper.
Take bits of wool and use a medium felting needle to poke the wool into the muslin, everywhere except the face.  
(If you don't have wool available, I sell it on my website).
Paint a scrap of muslin black on both sides and let dry.
Sand with fine sandpaper.
Cut 3 pieces from the scrap, each about 1/2" x 2".
Round off the short ends.
Pinch the center and stitch to the top of the face.
Cut some rusty wire about 30" long and poke through the side of one of the sheep, coming out the other side. 
Thread the 3 sheep onto the wire.
Tear 4 lengths of homespun, each about 1/2" x 6" and knot on the wire between the sheep.
Twist the ends of the wire wherever you want to hang your wooly garland.
Done!